


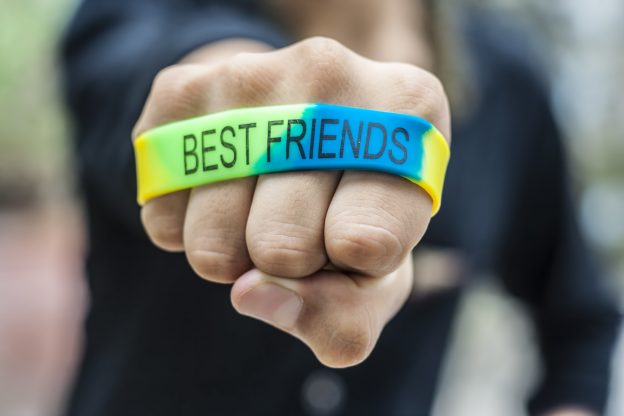
Remember when Lance Armstrong wore his yellow Livestrong silicone bracelet to build awareness in the fight against cancer? It later became his symbol when he created the Livestrong foundation.
Since then, silicone bracelets have been all the rage as a nonprofit fundraising and marketing tool. They get messages across like the yellow bands worn in MLB in 2018. And they’re also used by companies as a fun way to market and build their brand, like how Nike goes with the swoosh on the yellow.
But how exactly do you make rubber bracelets, you ask?
To give you a heads up on the wristband manufacturing process, we’ve put together this quick guide of basics. Keep reading to find out how simple it is to get these rubber bracelets made and then start thinking about how you can use them for your brand, messaging or fundraiser.
The Ideal Material for Wristbands
First, let’s take a quick look at the material and why it’s so great for the bracelets. Silicone is a versatile bonded polymer that makes it easy to work with, yet durable and strong. It’s man made with oxygen, silicon (think Silicon Valley), and other elements, often hydrogen and carbon, that give it elastomeric features.
Silicone has many uses as either a liquid or the rubbery plastic that’s used in the bracelets. It’s used in everything from shampoo and auto lube to electric insulation and kitchenware. It also seals pipes and makes containers water tight.
Another bit of trivia is that it is used to keep devices/electronics from getting shocked. But don’t think that’s what your bracelet is for! Think cool-looking fun and practical wrist wear.
For bracelets, silicone works ideally since it’s so flexible and waterproof, making it easy to put on and take off. It’s also quite sturdy.
The flexibility makes it super easy to customize. You can get the thickness, colors, and design you want. It’s also easy to emboss in various ways.
The Process
The wristband manufacturing process has been the same since the bracelets became so popular and useful in the 2000s. It’s basic and simple thanks to how easy silicone is to mold.
All you need to do is think about your messaging, colors, design, and size. You have so many options for colors, size, and style and the manufacturer will have you covered.
Production
Before construction can begin, you/the client gives specifications, including size, colors, messages, logos, and design. The whole project should reflect the brand and message you want to convey.
The most common size is one half inch wide and from 7 to 8.5 inches in circumference.
To start, the base rubber silicone stock is made by mixing the elements together. Typically, the color of the desired main bracelet is mixed in at this point. Often bracelets are multicolored so all the needed stock is made at this point.
Color for letters and images or design can be added to some stock at this point but can also be added as a second layer later. Also, lettering may be printed on or carved later anyway.
Next, the base rubber silicone stock is shaped into tubes or strips by cutting. The thickness of the tubes and strips can vary as needed.
Then, it’s time to mold the silicone stock. A steel mold is used. The stock goes in and is melted and a cross-section of the bracelet is done.
This cast can then be made to fit your needs to make the custom bracelet you want.
Messages and Logos
There are a variety of ways to add messaging and this is the key difference in how you make these bracelets.
For example, you can color print lettering and logos on after the mold is made. The least expensive option for that is silk-screening. You can also carve letters in or emboss. Here is the full list of ways to do the messaging.
Embossed Printing
The letters and logo look raised. It’s a 3-D effect that is molded right on the bracelet.
Embossed Filled
Ink is added to the letters to enhance the raised effect. This one is popular because it makes the letters stand out even more.
Debossed Printing
This is the Lance Armstrong-bracelet lettering style. Think yellow band with “Livestrong” on it. Laser carving is used to engrave the message right onto the wristband. This is popular and easy to produce in bulk.
Imprinted
Ink is printed right onto the bracelet. This style of printing gives you plenty of flexibility in design. It’s the easiest and most cost-effective way to get the messaging on.
Silkscreen printing can be used. Messaging can be printed on the inside and outside of the band.
Ink-Printed Debossed
Ink is added to the engraved letters. This makes the letters stand out.
Since the ink is in the recessed engraved letters, it gets added protection. Some people like this better than a standard print since the ink may last longer.
Dual-Layer Printing
Two layers in different colors are made. Letters and design are carved in the outside layer so you can see the color of the inside layer underneath. The outer layer is typically colored with oil spray.
This one is more difficult to make but it looks really cool and people love to wear it.
Figured Printing
A space is molded into the central area of the band, where the writing goes. The messaging is printed into the space.
Clients love this one because it really draws the eye to the letters and logo. The debossed types of printing can be combined with this one.
Make Rubber Bracelets for Your Messaging
Now that you know how easy it is to make rubber bracelets and how simple it is to customize them for your messaging and needs, it’s time to give them a go for your nonprofit, business or fundraiser. All you need is the message and your look, and we can help you come up with some different designs and price points.
Give us a call so we can answer any questions you may have and get you started today.
